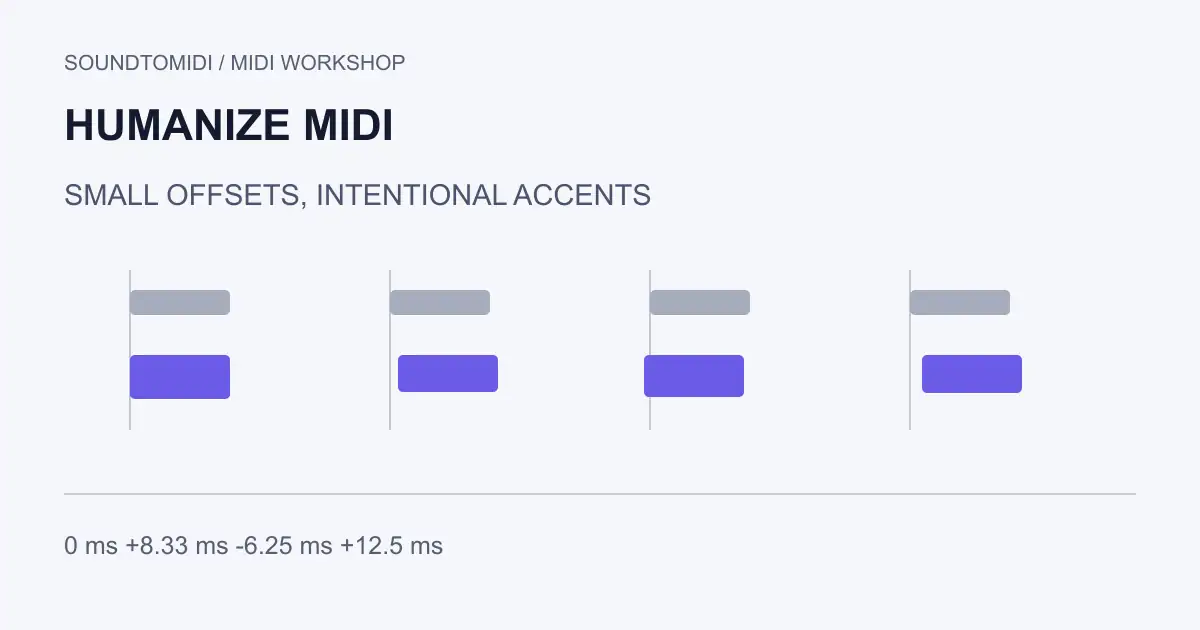
Humanizing MIDI means changing selected timing, note length or velocity details so a programmed part has the phrasing you want. Start with a small change to one property, compare against the original, and keep the version that fits the song. Randomness by itself is not a performance.
A tight bass line, a strummed guitar chord and a loose piano accompaniment need different treatment. Before touching a randomize control, decide what sounds wrong: identical attacks, flat accents, rigid chord starts, or note lengths that ignore the phrase.
The examples below are free. SoundToMIDI has a note editor, but no dedicated automatic humanize command; use a DAW or manual note editing for this task.
Hear the same phrase before changing everything
Download the straight phrase and small-offset phrase. Load both onto the same instrument in your sequencer and alternate between them. Match the instrument and effects so that you are comparing MIDI differences rather than different sounds.
These files were deliberately programmed at 120 BPM with a resolution of 480 ticks per quarter note. Each note keeps its pitch and 240-tick duration. Only its start and velocity change.
| Note | Straight start | Changed start | Offset | Velocity before → after |
|---|---|---|---|---|
| 60 | 0 ticks | 0 ticks | 0 ms | 80 → 88 |
| 62 | 480 ticks | 488 ticks | +8.33 ms | 80 → 74 |
| 64 | 960 ticks | 954 ticks | −6.25 ms | 80 → 83 |
| 67 | 1440 ticks | 1452 ticks | +12.5 ms | 80 → 76 |
This is an inspectable example of small changes, not a universal preset or a measured improvement in musical realism. The downbeat stays fixed; the other notes move in both directions. At a different tempo, the same tick offsets would represent different milliseconds.
Choose the musical anchors
Keep a duplicate of the clip. Identify the notes that establish its groove: perhaps the bass note on beat one, a repeated kick pattern, or a melody pickup that must meet the vocal. Leave those anchors alone for the first pass.
Then select a smaller group of less critical notes. A useful first experiment is to move just those starts slightly while retaining their order and lengths. Listen with the rest of the track, not only in solo. A timing change that sounds pleasant alone may collide with the snare or make a bass attack less clear.
For a chord, decide whether the notes should remain simultaneous. Independent random offsets can turn a block chord into an uneven roll. If you want a strum, an intentional low-to-high or high-to-low sequence is easier to control than independent random movement.
Apply a small timing pass
Ableton Live 12’s MIDI editing manual describes a Humanize utility for selected note starts. Its amount is relative to the current grid, so the grid affects the possible displacement. Apply a conservative amount, audition it, and undo if the groove becomes less convincing.
In another editor, use its documented timing randomization function or move the chosen notes manually with snapping adjusted as needed. Control names and units differ. Do not copy an amount from a screenshot without checking whether it means ticks, milliseconds, a percentage, or a fraction of a grid division.
Check the first and last notes of the clip. An early shift can push a note before the loop start; a late shift can cross the end. Repeated notes can overlap when their starts move but their ends are not handled consistently. The overlapping-notes guide covers that separate problem.
Shape velocity deliberately
Velocity is the note’s attack value, not a reliable synonym for final loudness. Its audible effect depends on the instrument. Some patches change timbre or sample layer as velocity rises; a narrow change can therefore sound larger than expected. See velocity versus volume before using a fader to imitate accents.
Start by making the phrase’s intentional accents clear. Lower supporting notes rather than raising everything. Preserve a quiet ending if that is part of the phrase. Only then consider small variation among repeated notes that still sound unnaturally identical.
Avoid a rule such as “every note gets a random velocity.” It can put the strongest accent on an unimportant passing note. Our example’s 88/74/83/76 pattern is a chosen contour, not the result of a realism model.
Check the exported result
Reopen the MIDI in a clean clip and compare note count, pitches, starts and durations. The example pair should contain the same four pitches and no extra notes. If the entire phrase shifted, the first note disappeared, or notes now extend beyond the loop, fix that before export.
Keep the untouched clip as an A/B reference. If the part was played by a person already, consider preserving its timing and correcting only distracting mistakes. Quantization moves timing toward a grid; humanization makes a different choice. Repeatedly applying both at full strength can erase the performance without producing a better one.